This article explains the steps to add a new mailbox to your iOS (iPhone/iPad) device.
|
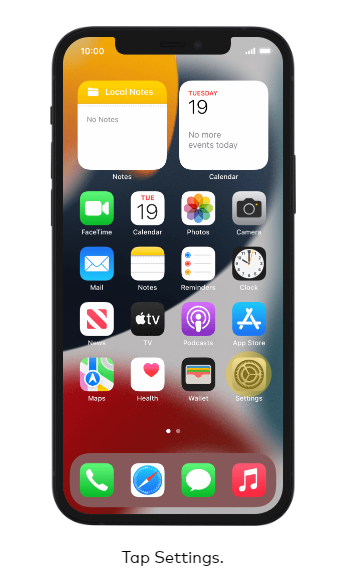
1. Open Settings app from your home screen. |
 |
| 2. Scroll down to and tap Mail in the Settings screen. | 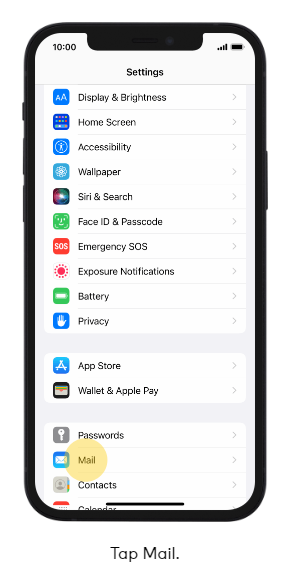 |
| 3. Tap Accounts from inside the Mail settings screen. | 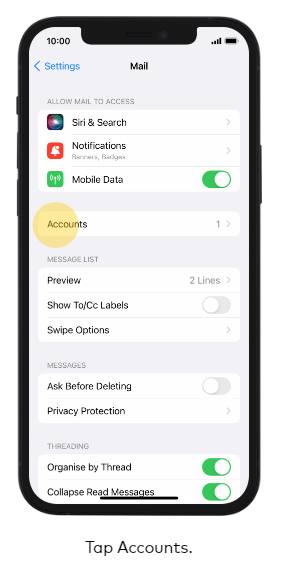 |
| 4. Tap on Add Account. | 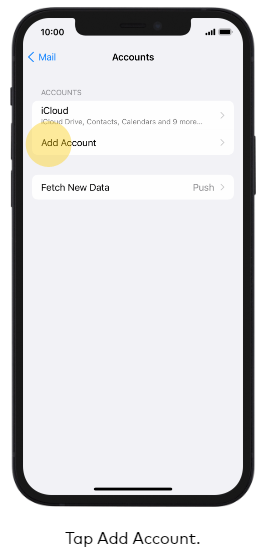 |
| 5. Tap Other as the account type. | 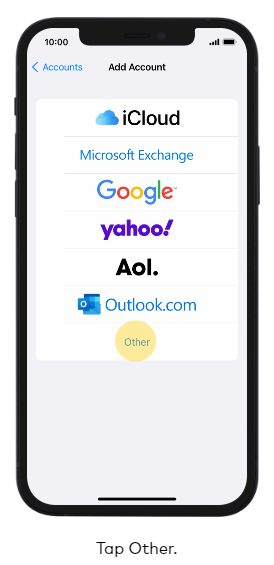 |
| 6. Tap Add Mail Account again. | 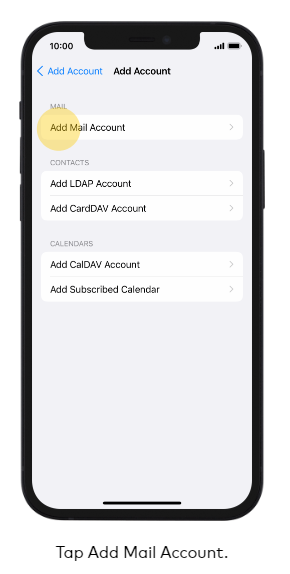 |
| 7. Enter the Display Name, this will be the name that appears to the receipient when you send an email from this device. | 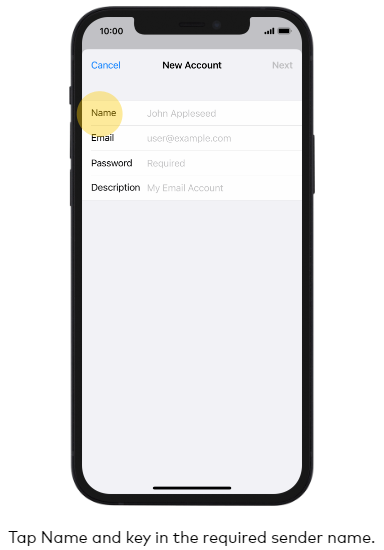 |
| 8. Enter the Email address you are wanting to add to the device. | 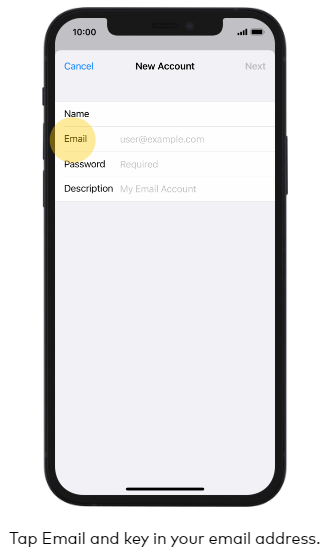 |
| 9. Enter the Password for the mailbox. | 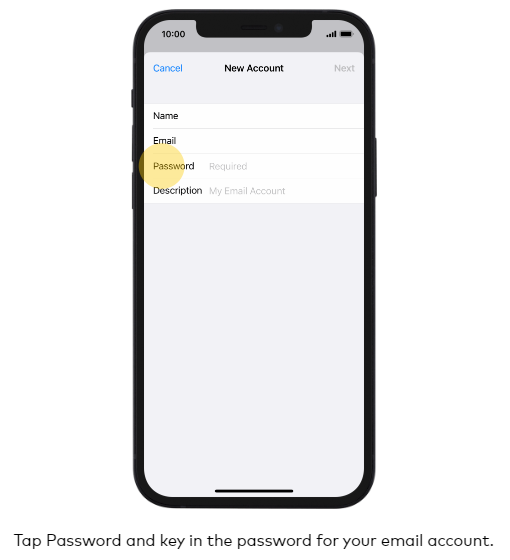 |
|
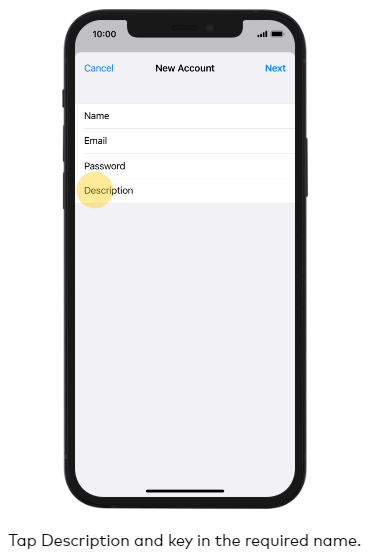
10. Enter a Description for the mailbox. This is optional and is how you will identify the Mailbox in the Mail app. |
 |
|
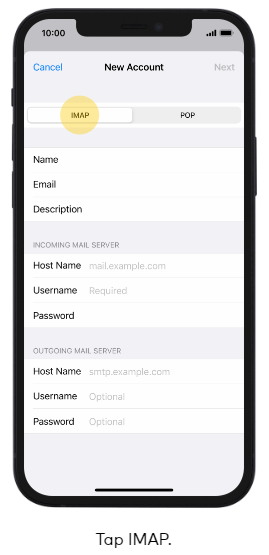
11. Choose IMAP as the server type (this means the emails will remain on the server and allow you to syncronise across multiple devices/computers). If you want the emails to download from the server and store on your iOS device then choose POP instead (not recommended).
|
 |
| 12. Tap Next to save the settings. | 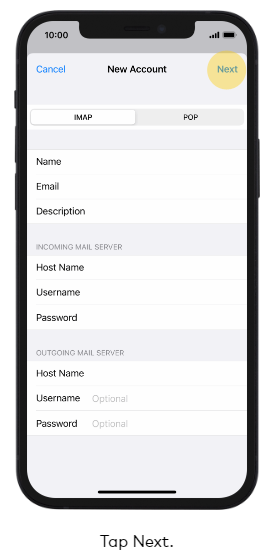 |
| 13. Make sure that Mail is toggled to the On position and then tap Save. | 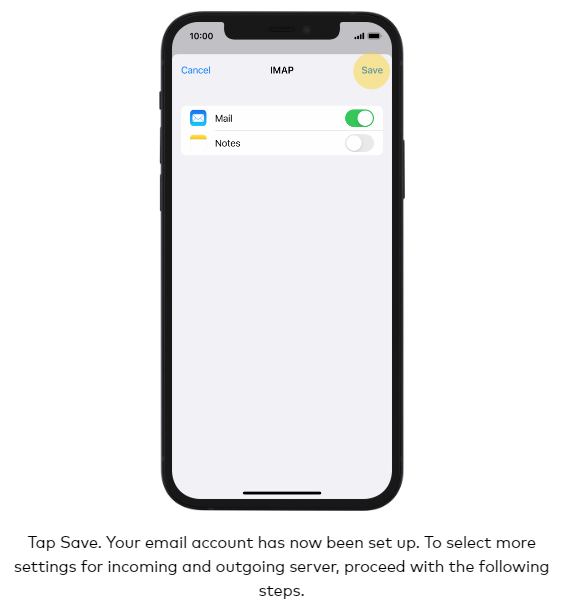 |
